Step-by-Step Guide: How to Set Up a Home Network

Setting up a home network may seem daunting, but with the right guidance, it can be a straightforward process. Whether you’re looking to share files, printers, or internet connections between devices, establishing a home network can simplify your digital life. In this step-by-step guide, we’ll walk through the process of setting up a reliable home network for your convenience.

Step 1: Assess Your Network Needs
Assessing your network needs is a crucial first step before making any decisions about your network infrastructure. Whether you are a small business, a large corporation, or a home user, understanding your network requirements is essential for ensuring smooth operations and performance.
To begin with, it’s important to evaluate the size and scale of your network. Consider the number of devices that will be connected, including computers, printers, smartphones, and other equipment. Understanding the volume of data traffic on the network is also key. This includes assessing the frequency and size of data transfers, as well as the demand for real-time applications such as video conferencing or VoIP.
Next, take into account the physical layout of your workspace or home. Determine the distance between devices and the type of building materials that might affect wireless signal propagation. This will help in choosing the right networking equipment and technologies to ensure reliable connectivity throughout the premises.

Step 2: Choose the Right Equipment
First and foremost, it’s important to assess the specific requirements of the activity or task for which the equipment is being chosen. Understanding the unique demands and nuances of the activity will help in determining what features and specifications the equipment should have. For example, for sports equipment, factors such as size, weight, durability, and grip may be crucial. On the other hand, for cooking equipment, considerations such as material, heat resistance, and ease of cleaning might be more important.
Once the specific requirements are clear, it’s time to research and compare the available options. With the vast amount of equipment and brands in the market, thorough research is vital to ensure that the chosen equipment meets the desired criteria. Reading product reviews, seeking recommendations from experts or experienced users, and comparing features and prices of different options can all aid in making an informed decision.
Lastly, it’s crucial to consider the budget when choosing equipment. Setting a clear budget and sticking to it can help narrow down the options and prevent overspending. While it’s important to invest in quality equipment, it’s also wise to strike a balance between quality and affordability to ensure that the chosen equipment offers the best value for the money.
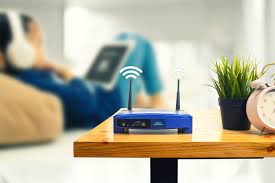
Step 3: Position Your Router
Positioning your router correctly is crucial for ensuring strong and reliable Wi-Fi coverage throughout your home. After setting up your internet connection, the next step is to carefully place your router to maximize its effectiveness.
The ideal location for your router is in a central area of your home, elevated off the floor, and away from obstructions such as walls and large objects. By placing it in a central location, the Wi-Fi signal can more evenly reach all areas of your home, providing better coverage.
Elevating the router off the floor is important because it reduces interference from objects and improves signal strength. Placing it on a high shelf or mounting it on a wall are good options to achieve this. Furthermore, keeping the router away from walls and large objects can also minimize interference and ensure that the Wi-Fi signal can propagate freely throughout the space. It’s important to avoid placing the router near devices that can cause interference, such as cordless phones, microwave ovens, and Bluetooth devices. These can disrupt the Wi-Fi signal and lead to slower internet speeds and weaker connections.
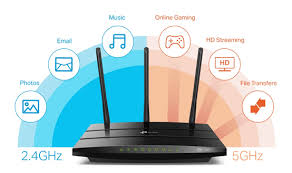
Step 4: Connect and Configure Your Router
Connecting and configuring your router is a crucial step in setting up your home or office network. Whether you’re a tech-savvy individual or a beginner in networking, following the proper steps to set up your router will ensure a smooth and secure connection. In this article, we’ll guide you through the process of connecting and configuring your router, catering to a diverse range of audience with varying levels of expertise in networking. Before delving into the setup process, ensure you have all the necessary equipment at hand. You’ll need your router, an Ethernet cable, and a computer or mobile device for configuration.
Begin by positioning your router in a central location to ensure optimal coverage throughout your space. Power on the router and connect it to your modem using the provided Ethernet cable. Once the connection is established, a power indicator on the router should illuminate.
Next, you’ll need to access your router’s configuration settings. Using your computer or mobile device, connect to the Wi-Fi network named on your router’s label or use the Ethernet cable to establish a direct connection. Open a web browser and enter the default IP address of the router in the address bar. This IP address is typically “192.168.1.1” or “192.168.0.1,” but you can find this information in the router’s manual.

Step 5: Connect Your Devices
After setting up the router, it’s time to connect your devices to the network. For wired connections, plug an Ethernet cable into your device and the router. For wireless connections, select your network from the available Wi-Fi options and enter the password when prompted.
Step 6: Test Your Network
Once all your devices are connected, it’s essential to test the network to ensure everything functions correctly. Verify that you can access the internet, share files between devices, and print documents if you have a network printer. Troubleshoot any connectivity issues by checking the router settings and rebooting devices if necessary.
Following these step-by-step instructions, you can set up a home network that meets your needs. A reliable home network can enhance connectivity, productivity, and entertainment, making it a valuable addition to any modern household.